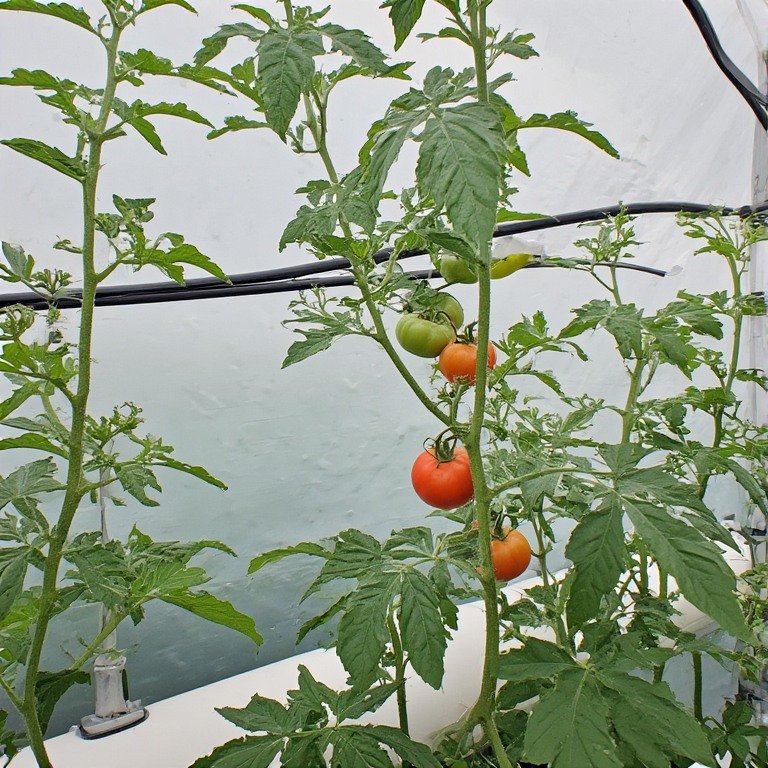
If you’ve ever stared at a sunny windowsill, a cramped balcony, or a crowded kitchen counter and wished you could grow something fresh there, you’re not alone. Hydroponics turns those tight spots into productive gardens without hauling bags of soil, dealing with weeds, or worrying about over‑watering. The trick is picking a system that fits your space, your light, and how much fuss you’re willing to tolerate. Below is a practical walk‑through of the three most common setups—balcony, windowsill, and countertop—along with the plants that thrive in each and a few habits that keep things running smoothly.
—
Why Hydroponics Works in Tight Quarters
Water‑wise – Recirculating systems reuse the same nutrient solution, often cutting water use by half or more compared with soil‑based pots.
Master growth – Roots get a constant feed of oxygen and nutrients, so leafy greens and herbs can reach harvest size 20‑30 % quicker.
Clean and light – No soil means no mess on floors or balconies, and the hardware is usually lighter than a pot full of wet earth.
Scalable – You can start with a single jar on the sill and expand to a vertical tower as confidence (and space) grows.
1. Balcony‑Friendly Systems
A balcony gives you real sunlight, but you still have to mind weight limits, wind, and water runoff.
Vertical towers – Stacked columns (like GreenStalk or Tower Garden) let you grow 20‑50 plants in under two square feet of floor space. Water is pumped from a base reservoir to the top and trickles down, delivering a steady stream of nutrients. Look for models with a built‑in drain tray to keep water from dripping onto neighbors.
NFT (nutrient film technique) rails – Two to four shallow channels hung on a wall or railing carry a thin film of nutrient solution past the roots. They work best for uniform crops like lettuce or basil and need a slight slope (about 1 %) to keep the flow moving.
Deep‑water culture buckets – A 3‑ to 5‑gallon bucket with an air stone and pump creates a bubbling reservoir. One bucket can support a few lettuce heads or a small herb cluster. Keep the bucket off the railing and close to a wall where the slab is strongest.
What to watch
Weight – Add up the reservoir, wet media, and plants; stay well under the balcony’s live‑load limit (ask your landlord or HOA for the exact number).
Wind – Tall towers can sway; a simple windbreak (a lattice panel or a row of heavier pots on the windward side) helps.
Light – Track sun hours. A south‑facing balcony in the northern hemisphere gets the most light; east/west may need a supplemental LED strip during winter.
Drainage – Make sure excess water can flow away cleanly; a saucer or a small gravel bed under the system prevents standing water that could stain or seep.
2. Windowsill Solutions
When outdoor space is limited, a sunny sill can become a mini‑farm. The key is keeping the footprint small and the system quiet enough for a living area.
Kratky jars – The simplest passive method. Fill an opaque jar or bucket with nutrient solution, drop in a net pot with clay pebbles or rockwool, and let the plant drink down. As the solution level falls, an air gap forms, giving roots oxygen. No pump, no electricity—just a jar on the sill and a little light. Ideal for lettuce, herbs, or microgreens that finish in 3‑4 weeks.
Small DWC bins – A shallow food‑grade container (about 1‑2 gal) with an air stone and a couple of net pots works well for a windowsill garden. The pump hum is low; you can place a towel underneath to deaden vibration.
LED clip‑on lights – If your sill gets less than six hours of direct sun, a flexible LED strip with a clip (5‑10 W) provides the boost needed for steady growth. Look for a light with a color temperature around 6500 K and a dimmer so you can adjust as plants mature.
Tips
Depth matters – Measure the sill width; jars or trays should sit securely without overhanging.
Avoid hot glass – In summer, a south‑facing window can overheat roots; a sheer curtain or a small fan circulates air.
Rotate – Give each plant a quarter turn every few days so all sides get light and growth stays even.
3. Countertop Kits
The kitchen counter is prime real estate for herbs you use while cooking. Plug‑and‑play units take the guesswork out of lighting and pumping, though they do add a bit of ambient noise.
All‑in‑one smart gardens – Models like the AeroGarden Bounty Elite, Click & Grow Smart Garden 3, or Rise Personal Garden have built‑in LEDs, a pump, and a timer. Some now include touchscreen guides that tell you when to add water or nutrients. Footprints range from 12 × 6 in to 16 × 6 in, holding anywhere from 3 to 12 plants.
DIY countertop DWC – If you prefer to build your own, a shallow plastic bin (about 6 × 8 in) with an air stone, a couple of net pots, and a small submersible pump works fine. Add a flexible LED strip on a gooseneck arm for adjustable lighting.
What to consider
Noise – Most pumps emit a soft hum; placing the unit on a silicone mat or a folded towel reduces vibration transfer to the countertop.
Light spill – LEDs can be bright at night; a dimmer or a schedule that turns the light off after 10 p.m. keeps the kitchen comfortable.
Maintenance – Top‑off the reservoir every few days, check pH weekly (aim for 5.5‑6.5), and rinse the bin between cycles to prevent algae.
4. Picking the Right Plants
Not every crop loves a confined hydroponic setup. Stick to varieties that stay compact and have short harvest cycles.
Leafy greens – Lettuce (Buttercrunch, Romaine), spinach, arugula, mizuna, and kale varieties like ‘Dwarf Green Curled’.
Herbs – Basil, mint, parsley, cilantro, chives, and thyme. (Note: mint can be invasive; give it its own container.)
Fruiting plants – Strawberries (everbearing varieties like ‘Alba’ or ‘Seascape’) and dwarf pepper or tomato cultivars (e.g., ‘Tiny Tim’, ‘Patio Choice Yellow’) work if you have enough vertical space and light.
Microgreens – Radish, broccoli, mustard, and pea shoots are ready in 7‑10 days and need only a shallow tray.
5. Quick Maintenance Habits
1. Check pH and EC – A cheap pen‑style meter lets you verify the nutrient solution stays in the sweet spot (pH 5.5‑6.5; EC 1.2‑2.0 mS/cm for most greens). Adjust with pH‑up/down or dilute with fresh water as needed.
2. Refresh nutrients – Every 1‑2 weeks, replace half the reservoir with fresh mixed nutrients to avoid imbalances.
3. Clean hardware – Rinse net pots, wipe down reservoirs, and occasionally run a hydrogen peroxide dilution (3 ml H₂O₂ per liter of water) through the system to keep biofilm at bay.
4. Watch for pests – Even indoor setups can get aphids or spider mites. A quick spray of insecticidal soap or a neem‑oil wipe usually solves it.
5. Log your steps – A simple notebook or phone note tracking when you changed nutrients, trimmed plants, or noticed a issue makes troubleshooting faster.
Bottom Line
You don’t need a sprawling greenhouse to enjoy fresh, home‑grown produce. A jar on the windowsill, a tower on the balcony, or a sleek countertop kit can turn the tiniest nook into a steady supply of greens, herbs, and even strawberries. Start small, learn what your space and routine prefer, and let the system expand with your confidence. The first crisp bite of lettuce you grew yourself—no soil, no mess—will make the effort feel instantly worthwhile.
—
*Tags*: hydroponics, balcony gardening, windowsill garden, countertop hydroponics, small space gardening, urban farming, DIY hydroponics, vertical towers, Kratky method, AeroGarden
Category: Hydroponics Guides
Leave a Reply